When your building your own vRack configuration, there are a few things you would need to prepare. You would need to ensure you have the services which is compatible with the vRack, these would be services which physically has an double NIC card for the vRack connection.
Another point to consider is the IP addressing which you would be using. Whilst you can route public IP into the vRack, it would be considered as wasteful as the public IP can be used for public connections. Typically we would be looking to make use of private IP address such as 192.168.0.1.
In our example, we will be looking to configure an vRack environment with both dedicated servers and dedicated cloud. This in essence will provide us with an hybrid infrastructure. We will set the dedicated cloud as the front end public interface serving as an web server and to have our dedicated server in the back end as the database.
Dedicated Cloud
The dedicated cloud will be based upon ESXi as this allows us to grow our resources for our front end web server.
For our dedicated cloud VM, we will assign it 2 network adapters, this is because the first network adapter of eth0 will be accessible publicly for public connections from the internet and eth1 will be the secondary network adapter which will be connected to our dedicated server serving as an database in the backend.
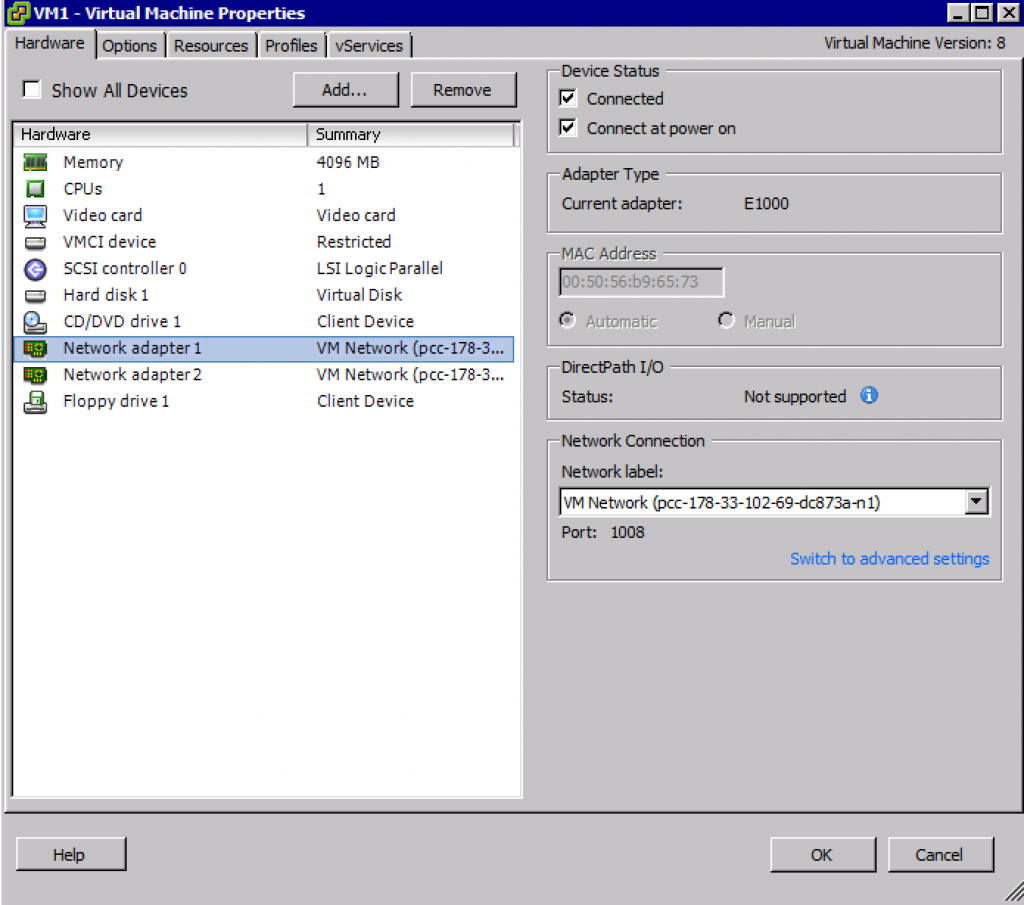
We will be looking to use Ubuntu as our OS for our VM and the chosen web server to be Apache, the vRack works with any OS and any web server as the vRack is based upon network configuration rather than OS dependent. We will be using 192.168.0.1 as our front end private IP.
eth0      Link encap:Ethernet  HWaddr 00:50:56:b9:65:73
          inet addr:178.32.248.71  Bcast:178.32.248.71  Mask:255.255.255.255
          inet6 addr: fe80::250:56ff:feb9:6573/64 Scope:Link
          UP BROADCAST RUNNING MULTICAST  MTU:1500  Metric:1
          RX packets:4645871 errors:0 dropped:51 overruns:0 frame:0
          TX packets:2599219 errors:0 dropped:0 overruns:0 carrier:0
          collisions:0 txqueuelen:1000
          RX bytes:686436155 (686.4 MB)  TX bytes:390188720 (390.1 MB)

eth1      Link encap:Ethernet  HWaddr 00:50:56:b9:65:cc
          inet addr:192.168.0.1  Bcast:192.168.255.255  Mask:255.255.0.0
          inet6 addr: fe80::250:56ff:feb9:65cc/64 Scope:Link
          UP BROADCAST RUNNING MULTICAST  MTU:1500  Metric:1
          RX packets:2163791 errors:0 dropped:50 overruns:0 frame:0
          TX packets:3133 errors:0 dropped:0 overruns:0 carrier:0
          collisions:0 txqueuelen:1000
          RX bytes:309448353 (309.4 MB)  TX bytes:299023 (299.0 KB)
Please be aware that depending on your OS, the vRack adapter maybe known as an different value.
Here is an example of an eno2:

eno2: flags=4163  mtu 1500
        inet 192.168.0.1  netmask 255.255.0.0  broadcast 192.168.255.255
        inet6 fe80::225:90ff:fea6:aae9  prefixlen 64  scopeid 0x20
        ether 00:25:90:a6:aa:e9  txqueuelen 1000  (Ethernet)
        RX packets 751907  bytes 50093608 (47.7 MiB)
        RX errors 0  dropped 0  overruns 0  frame 0
        TX packets 2702604  bytes 4090846568 (3.8 GiB)
        TX errors 0  dropped 0 overruns 0  carrier 0  collisions 0
        device memory 0xfb900000-fb91ffff
Dedicated Cloud Windows
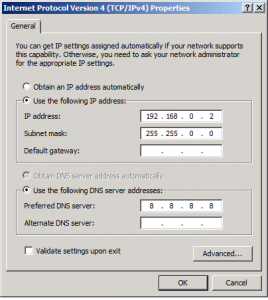
If your working with windows as the web server, you would be needing to configure the VM accordingly against windows environments. For windows the configuration would be performed under the networking settings in control panel.
Dedicated Server
For our dedicated server, we will be looking to use it to store our database information. Naturally it will have an public static IPv4 but we will also be using the secondary network interface of eth1 and configuring this as 192.168.0.50. We can look to configure this in ascending order but we may look to introduce more front end servers. By setting the database server on .50 we can allow our front end servers to expand accordingly as our requirements change.
Our dedicated server would have the following configuration on the same private IP class of 192.168.0.1
sudo nano /etc/network/interfaces

auto eth1
iface eth1 inet static
address 192.168.0.50
netmask 255.255.0.0
broadcast 192.168.255.255
This will set the secondary network interface eth1 to have the IP of 192.168.0.50. At the same time, we will be looking to disable the eth0 as we wouldn’t want any public connections to be made to our database. If you disable the public connection, you will lose access to the server yourself, it is recommended that you use KVM for this part. Our ifconfig will show:
Backend dedicated server with private IP access only

eth1      Link encap:Ethernet  HWaddr 00:25:90:7b:b5:f1
          inet addr:192.168.0.50  Bcast:192.168.255.255  Mask:255.255.0.0
          inet6 addr: fe80::250:56ff:feb9:65cc/64 Scope:Link
          UP BROADCAST RUNNING MULTICAST  MTU:1500  Metric:1
          RX packets:2163791 errors:0 dropped:50 overruns:0 frame:0
          TX packets:3133 errors:0 dropped:0 overruns:0 carrier:0
          collisions:0 txqueuelen:1000
          RX bytes:309448353 (309.4 MB)  TX bytes:299023 (299.0 KB)
Now we have our very own private vLAN which uses private IP to route data between the two services within our infrastructure. The dedicated cloud for our web server and the dedicated server for our database.
For CentOS configuration you would use the following:
nano /etc/sysconfig/network-scripts/ifcfg-eth1

DEVICE=eth1
BOOTPROTO=static
IPADDR=192.168.0.50
NETMASK=255.255.0.0
ONBOOT=yes
This implementation is based upon the vRack 1.5, to configure advance vRack 2.0 tagging you can achieve up to 4000 vLans within a single vRack.